This past week at Nutanix .NEXT, Acropolis was officially announced although it has actually been available and running in many customer environments (1200+ nodes globally) for a long time.
One of the new features is VM High Availability.
As with everything Nutanix, VM HA is a very simple yet effective feature. Let’s go through how to configure HA via the Acropolis/PRISM HTML 5 interface.
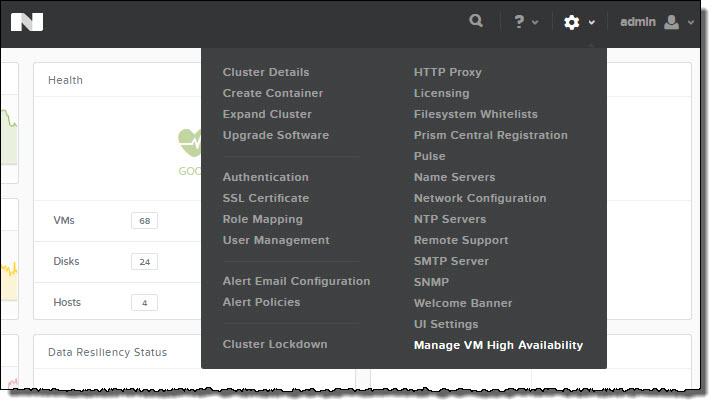
As shown below, using the “Options” menu represented by the cog, there is an option called “Manage VM High Availability”.
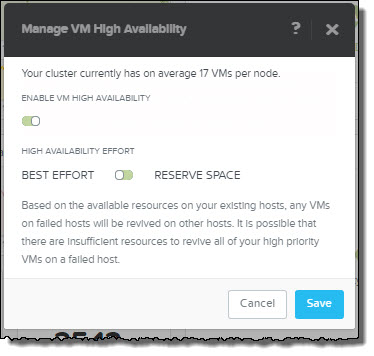
The Manage VM High Availability has 2 simple options shown below:
1. Enable VM High Availability (On/Off)
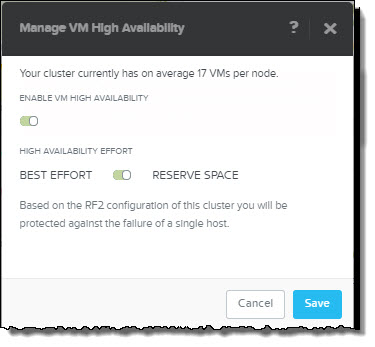
2: Best Effort / Reserve Space
Best Effort works as you might expect where in the event of a node failure, VMs are powered on throughout the cluster if resources are available.
In the event resources e.g.: Memory, are not available then some/all VMs may not be powered on.
Reserve Space also works as you might expect by reserving enough compute capacity within the cluster to tolerate either one or two node failures. If RF2 is configured then one node is reserved and if RF3 is in use, two nodes are reserved.
Pretty simple right!
The best part about Reserve Space is its like “Host failures cluster tolerates” in vSphere, however without using the potentially inefficient slot size algorithm.
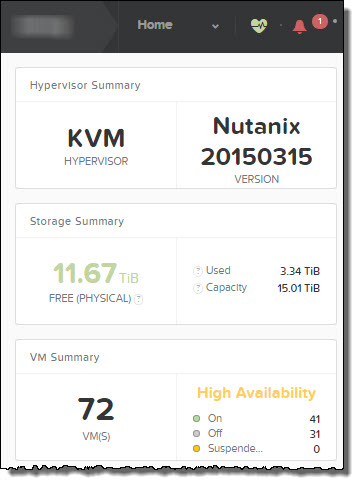
Once HA is enabled, it appears on the Home screen of PRISM and gives a summary of the VMs which are On,Off and Suspended as shown below.
HA can also be enabled/disabled on a per VM basis via the VMs tab. Simply highlight the VM and click “Update” as shown below.
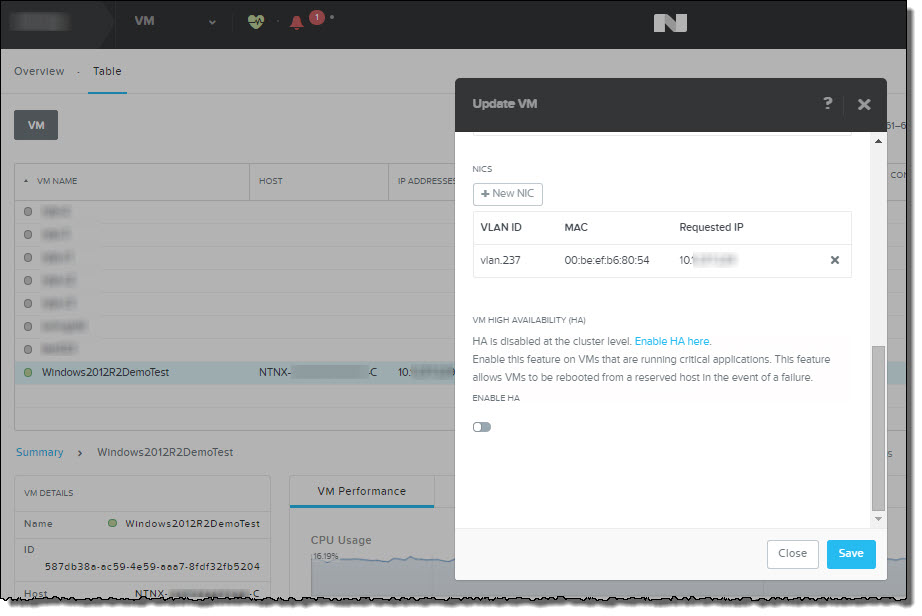
Then you will see the “Update VM” popup appear. Then simply Enable HA.
In the above screenshot you can see that the popup also warns you if HA is disabled at the cluster level and allows you to jump straight to the Manage VM High Availability configuration menu.
So there you have it, Acropolis VM High Availability, simple as that.
Related Articles:
1. Acropolis: Scalability
2. What’s .NEXT? – Acropolis!
3. What’s .NEXT? – Erasure Coding!

