Data Centre Migration Strategies – Part 2 – Lift and Shift

Continuing on from Data Centre Migration Strategies Part 1 – Overview, Part 2 focuses on the “Lift and Shift” method.

I’m sure your reading this and already thinking, “this is the least interesting migration strategy, tell me about vMSC and SRM!” and well, your right, BUT it is important to understand the pros and cons so if you are ever in a situation where you have to use this method (I have on numerous occasions) that the migration is successful.

So what are the pros and cons of this method.

Pros

1. No need to purchase equipment for the new data centre
2. The environment should perform as it did at the original data centre following relocation
3.The approach is simple from a technical perspective ie: No new products are required
4. Low direct cost (Note: Point 8 in Cons)
5. Achieves a Recovery Point Objective (RPO) of zero (0).

Cons

1. The entire environment needs to be fully shut-down
2. The outage for the environment starts from when the servers are shut-down, until completion of operational verification testing at the new datacenter. Note: This may take several days depending on the size of the environment.
3. This method is high risk as the ability to fail back to the original datacenter requires all equipment be physically relocated back. This means the Recovery Time Objective (RTO) cannot be low.
4. The Lift and shift method cannot be tested until at least a significant amount of equipment has been physical relocated
5. In the event of an issue during operational verification at the new data centre, a decision needs to be made to proceed and troubleshoot the issues, OR at what point to fail back.
6. Depending on your environment, a vendor (eg: Storage) may need to revalidate your environment
7. Your migration (and schedule) are heavily dependant on the logistical side of the relocation which may have many factors (eg: Traffic / Weather) which are outside your control which may lead to delays or failed migration.
8. Potentially high indirect cost eg: Downtime, Loss of Business , productivity etc

When to use this method?

1. When purchasing equipment for the new data centre is not possible
2. When extended outages to the environment are acceptable
3. When you have no other options

Recommendations when using “Lift and Shift”

1. Ensure you have accurate wiring and rack diagrams of your datacenter
2. Be prepared with your vendor support contact details on hand as it is common following relocation of equipment to have hardware failures
3. Ensure you have an accurate Operational Verification document which tests every part of your environment from Layer 1 (Physical) all the way to Layer 7 (Application)
4. Label EVERYTHING as you disconnect it at the original datacenter
5. Prior to starting your data centre  migration, discuss and agree on a timeline for the migration and at what point and under what situation do you initiate a fail back.
6. Migrate the minimum amount of physical equipment that is required to get your environment back on-line and do your Operational Verification, then on successful completion of your Operational Verification migrate the remaining equipment. This allows for faster fail-back in the event Operational Verification fails.

In Part 3, we discuss Data centre migrations using VMware Site Recovery Manager. (Coming soon)


Write I/O Performance & High Availability in a scale-out Distributed File System

Following on from my recent post titled “Data Locality & Why is important for vSphere DRS clusters” I would like to discuss at a high level how Write I/O works in the Nutanix Distributed File System, how the solution ensures high availability in the event of a node failure and what impact a failure has on performance.

Lets start with a typical Write operation.

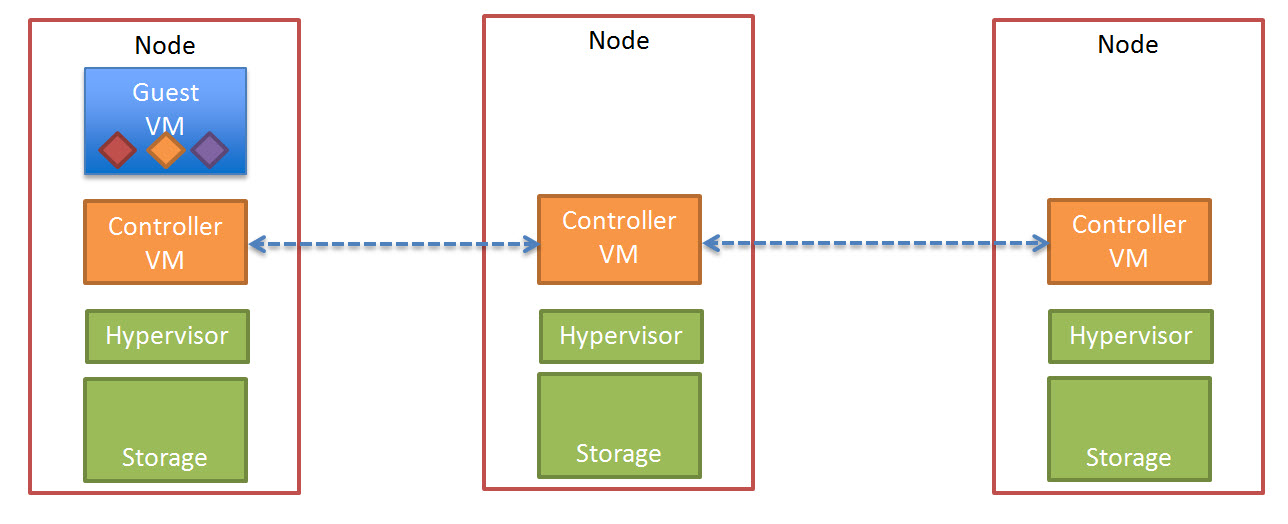
The below diagram shows a three (3) node Nutanix cluster with a Guest VM starting to perform write I/O, this is represented in a simplistic manor by the three (3) Diamonds (Red, Yellow and Purple)

NutanixWriteIOstart

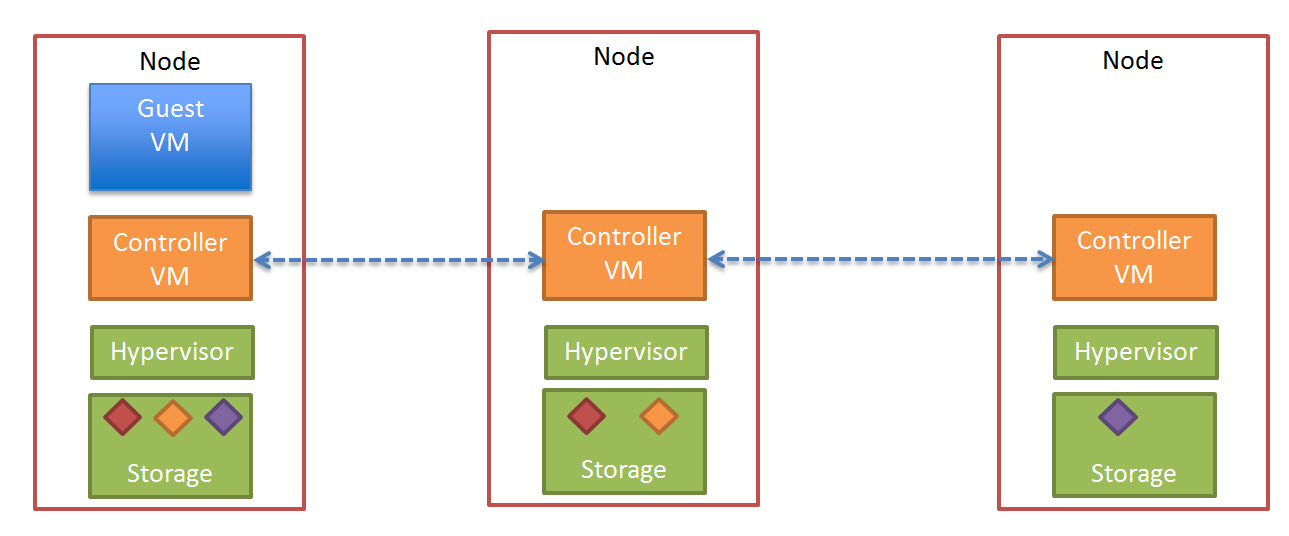
The write I/O is written to the local SSD tier (as is every Write in a Nutanix environment) as shown below.

NutanixWriteDataWrittenLocal

Before acknowledging the write the Nutanix Controller VM (CVM) then replicates a copy of the data across the Nutanix Distributed File System.

The below diagram illustrates what this looks like in a three node cluster.

NutanixWriteSyncToOtherNodes

Once the data in successfully written to other nodes within the cluster, the Write acknowledgement is given. This ensures data is consistent and always protected.

In a Nutanix cluster, as Controllers (Nutanix CVMs) are scaled linearly with the ESXi hosts, Write I/O is then spread over more controllers, reducing the chance of contention in the environment at both a storage controller and network layer as each controller shares 2 x 10Gb connections per node.

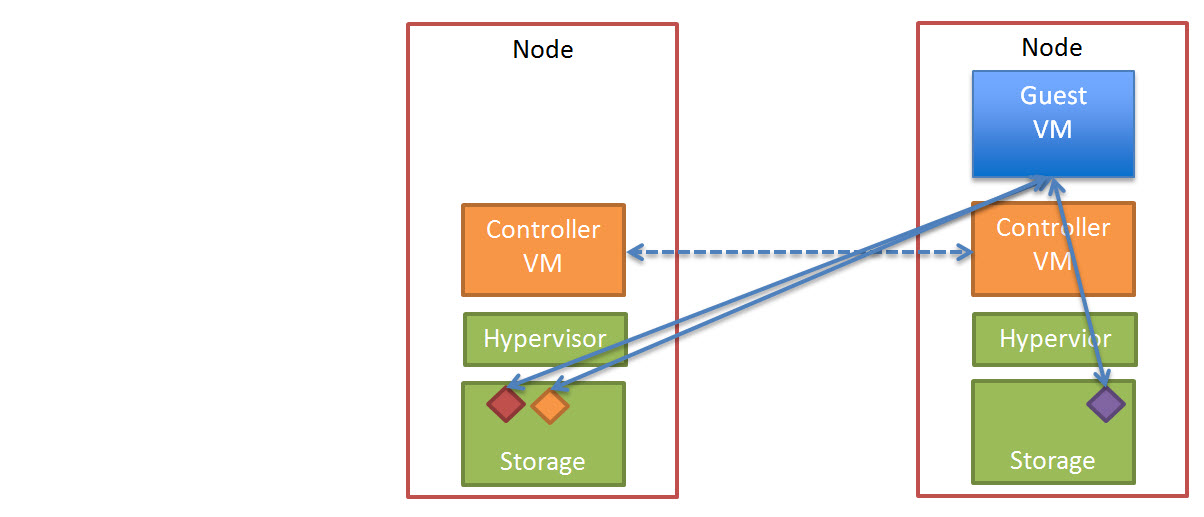
In the event of a node failure, in a vSphere cluster, HA will restart the failed VM/s onto a surviving node in the cluster.

The VM will start-up and operate as normal and where data is not local to the node (as discussed in detail in my post  “Data Locality & Why is important for vSphere DRS clusters“) the data will initially be accessed over 10Gb before being replicated locally for future reads.

NutanixHAAfterWithDataAccess

All future writes for the VM/s which have been restarted by HA on different nodes will perform at a similar rate (if not the same rate) as they did before the failure depending on how many nodes are in the cluster. Where the Network is not a bottleneck, there should be minimal/no difference in write performance after a node failure.

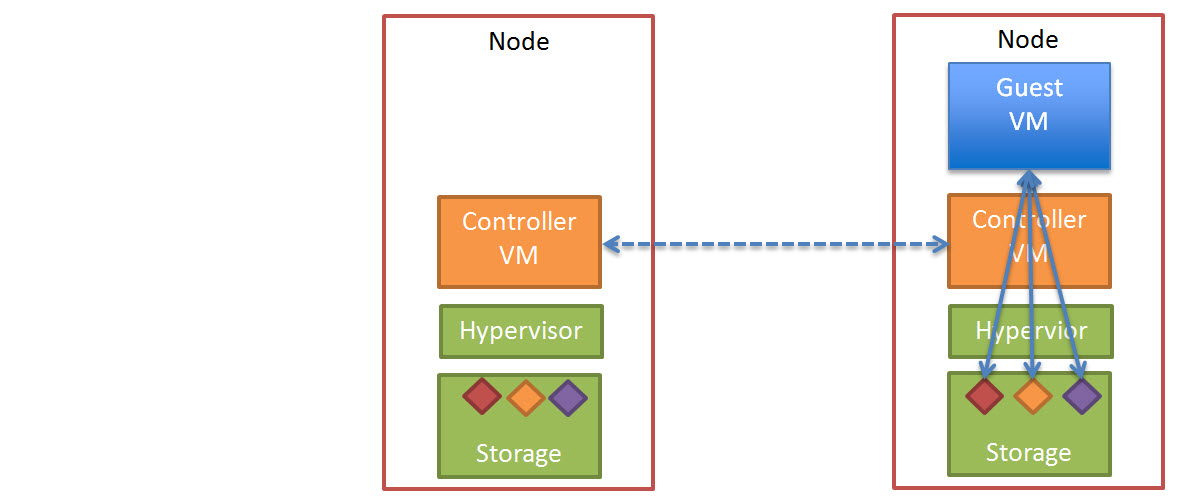
The Nutanix cluster will also detect a node has failed, and ensure two copies of all data are available, and in the above example where only one copy of the data exists, the cluster will replicate the required data to ensure High Availability (“Replication Factor” of 2) is maintained.

As this replication is done across multiple controllers and nodes, it is much faster and lower impact than a traditional RAID rebuild which most of us will be familiar with.

The end state of this process looks like this.

NutanixHAEndState

So in conclusion using a “scale-out” storage controller solution like Nutanix ensures consistent high write performance even immediately following a node failure by eliminating the requirement for RAID style rebuilds which are disk intensive and can lead to “Double Disk Failures” and data loss.

The replication of data being distributed across all nodes in the cluster ensures minimal impact to each Nutanix controller, ESXi host and the network while ensuring the data is re-protected as soon as possible.

Related Articles

1. Data Locality & Why is important for vSphere DRS clusters


VMware Host Isolation Response in a Nutanix Environment #NoSAN

I was recently discussing the Nutanix solution with a friend of mine and fellow VCDX, Michael Webster (@vcdxnz001) and he asked what the recommended Host Isolation Response is for Nutanix.

At this stage I must advise there is no formal recommendation, but an Official vSphere on Nutanix Best Practice guide is in the works and will be released asap.

Back to my conversation with Michael, Being that Nutanix is an IP Storage solution, my initial feeling is that Host isolation Response should be set to “Shutdown”, but I didn’t go into any more detail with Michael, so I thought it best to post a quick explanation.

This post also assumes basic knowledge of vSphere as well as the Nutanix platform, for those of you who are not familiar with Nutanix please review the following links prior to reading the remainder of this post.

About Nutanix | How Nutanix Works | 8 Strategies for a Modern Datacenter

So back on topic, in other posts I have written for IP Storage, such as (Example Architectural Decision – Host Isolation Response for IP Storage) I have concluded that “Shutdown” was the most suitable setting and recommended specifying isolation addresses of the NAS controllers.

But as Nutanix changes the game and has one virtual storage controller per ESXi host, so does this change the recommendation?

In short, No, but for those who are interested, here is why.

If we leave the default isolation address, (being the default gateway for ESXi Management), in the event the gateway is down, it will trigger an isolation response even if the rest of the network is operating fine, thus an unnecessary outage would occur.

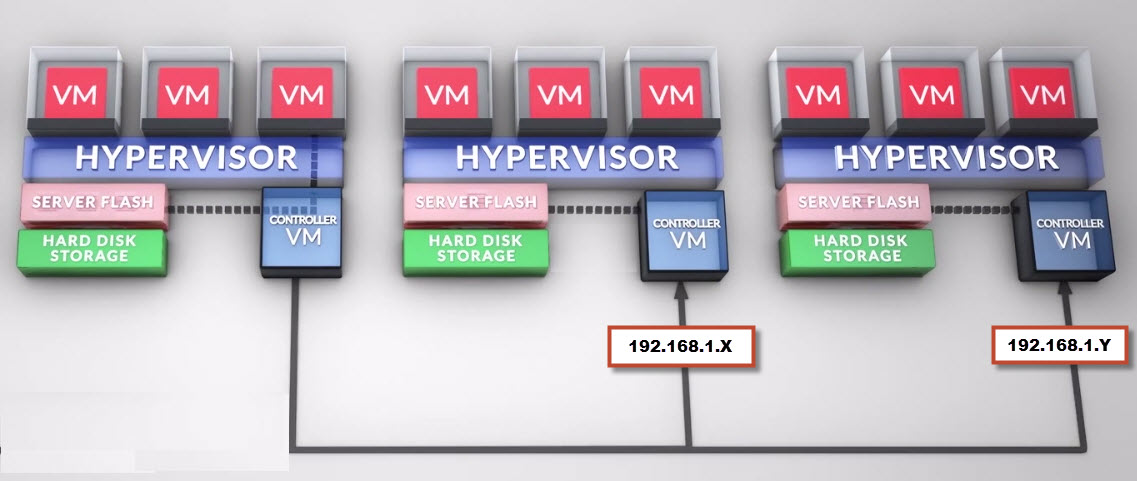
If we configure das.isolationaddress1 & 2 with the Management IP address of any two Nutanix Controller VMs (192.168.1.x , 192.168.1.y in my below diagram) then an isolation response will only be triggered if both Nutanix Controller VMs (CVMs) are not responding, in which case, the VMs should be Shutdown as the Nutanix cluster may not be function properly with two Controllers offline concurrently as its configured by default for N+1 (or replication factor of “2” in Nutanix speak).

The below is a high level example of the above configuration.

NutanixHostIsolation

Related Articles

1. Example Architectural Decision – Host Isolation Response for a Nutanix Environment

2. Storage DRS and Nutanix – To use, or not to use, that is the question?

3. VMware HA and IP Storage